DOM
The DOM is a tree structure. Every node has a nodeType attribute.
| Node Type | Constant | Explaination |
|---|---|---|
| 1 | Node.ELEMENT_NODE |
"normal" tags |
| 3 | Node.TEXT_NODE |
Text nodes |
| 8 | Node.COMMENT_NODE |
Comment nodes |
The children of a node can be retrieved by either node.childNodes which returns a NodeList or by node.children which returns an HTMLCollection. The HTMLCollection only contains element nodes.
Find Elements
let aboutus = document.getElementById("aboutus")
let aboutlinks = aboutus.getElementsByTagName("a")
let aboutimportant = aboutus.getElementsByClassName("important")
let navlinks = document.querySelectorAll("nav a")
Modifiy the DOM
The DOM can be modified with the methods parent.appendChild(node), parent.insertBefore(node, sibling) and node.remove() (removes itself).
To create a new node, methods like document.createElement(type), document.createAttribute(name), element.setAttributeNode(attributeObj) are useful.
Event Handling
An event handler can be registered with any DOM element.
One caveat of the onclick property is that only one onclick listener can be register per elements. No such restriction exists with addEventListener
const listener = e => console.log(`button clicked at ${e.x}/${e.y}`)
button.addEventListener("click", listener)
// or
button.onclick = () => console.log("button clicked 2")

// to remove the listener
button.removeEventListener("click", listener)
| Event Type | Explanation | Event-Obj |
|---|---|---|
click |
When a DOM element was clicked by a mouse/touch | x, y, button |
dblclick |
When an DOM element was double clicked | |
mousedown |
When a mouse button is pressed over the DOM element | x, y, button |
mouseup |
When the mouse button was released | |
touchstart |
When a touch event was started. | |
touchmove |
When while touching the screen, the finger moves | |
touchend |
When the touch gesture ends | |
keydown |
When a key was pressed | |
keyup |
When a key was lifted | |
input |
When a character was inputted into a textfield | |
scroll |
When the page is being scrolled | |
focus |
When focusing an element. This event is not propagated. | |
blur |
When the registered element looses focus. This event is not propagated. | |
load |
When the registered element finished loading. Is emitted for window, document.body and elements with external resources (like img tags). This event is not propagated. |
|
beforeunload |
Before the user leaves the page.This event is not propagated. |
Event Object
MDM-Documentation: https://developer.mozilla.org/en-US/docs/Web/API/Event
The event objects contains multiple properties which can be usefull:
| Event-Typ | Property | Explanation |
|---|---|---|
| general | target |
The element which caused the event |
| general | currentTarget |
The element on which the listener was registered on |
Event Bubbling
An event "bubbles up" until it reaches the window object or a handler calls event.stopPropagation(). With event.preventDefault() the default behaviour of an DOM element can be prevented.
document.querySelector("p").addEventListener("mousedown", () => console.log("Handler for paragraph."))

document.querySelector("button").addEventListener("mousedown", event => {
    console.log("Handler for button.")
    if (event.button == 2) event.stopPropagation()
}

                                                 document.querySelector("a").addEventListener("click", event => {
    console.log("Handler for a link.")
    event.preventDefault() // prevents the link from working
}
Animation
requestAnimationFrame(function) will call the given function shortly before the browser draws the next frame. This enables animation to be created in javascript.
function animate (time, lastTime) {
    /* calculate new position */
    /* ... */
    requestAnimationFrame(newTime => animate(newTime, time))
}

requestAnimationFrame(animate)
SVG
SVG can be directly written in HTML with the svg tag and can be styled with css. SVGs can also be loaded with the img tag.
<p>Normal HTML here.</p>
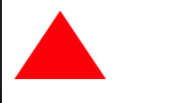
<svg xmlns="http://www.w3.org/2000/svg">
<circle r="50" cx="50" cy="50" fill="red"/>
<rect x="120" y="5" width="90" height="90"
stroke="blue" fill="none"/>
</svg>

JavaScript can access and modify SVG graphics (when loaded with svg), like:
Canvas
TODO: insert better examples
With a canvas, JavaScript can render graphics.
<p>Before canvas.</p>
<canvas width="120" height="60"></canvas>
<p>After canvas.</p>
<script>
    let canvas = document.querySelector("canvas")
    let context = canvas.getContext("2d")
    context.fillStyle = "red"
    context.fillRect(10, 10, 100, 50)
</script>
With canvas, there are turtle-like graphics:
let cx = document.querySelector("canvas").getContext("2d")
cx.strokeStyle = "blue" // sets the outline to blue
cx.fillStyle = "red" // sets the color of the object to red
cx.beginPath()
cx.moveTo(50, 10)
cx.lineTo(10, 70)
cx.lineTo(90, 70)
cx.fill()
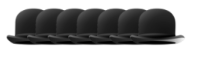
An image can be loaded like this:
let cx = document.querySelector("canvas").getContext("2d")
let img = document.createElement("img")
img.src = "img/hat.png"
img.addEventListener("load", () => {
    for (let x = 10; x < 200; x += 30) {
        cx.drawImage(img, x, 10)
    }
})
There are a lot more you can do with a canvas tag, like quadraticCurveTo, bezierCurveTo, arc, text, scale, translate, rotate and a stack infrastructure with save and restore.
The coordinate system of a canvas starts in the top left corner at (0/0)
Form
<form method="post" action="/form1">
    <label for="nameid">Name: </label>
    <input type="text" id="nameid">
    <label for="ageid">Age: </label>
    <input type="text" id="ageid" name="age">
    <input type="submit" value="Send">
</form>

<form>
    <label>Name: <input type="text"></label>
    <label>Age: <input type="text"></label>
    <input type="submit" value="Send">
    <button disabled>disabled button</button>
</form>
The forms above define a form in HTML. Both define the same form but the first one uses for to specify which label belongs to which input-element. In the second example this done by nesting the input-element in the label-element.
When the submit-button has been pressed then the form will be sent to the server except if preventDefault() is called on the submit-event.
Form elements can be disabled by adding a disabled attribute to the form-tag.
The following attributes are useful to know:
- attribute
method: if the form should be sent with apostrequest or agetrequest(like/form1?nameid=...&age=...). But withgetrequest the data is limited as it needs to be sent over the address line (often limited to 1000 chars)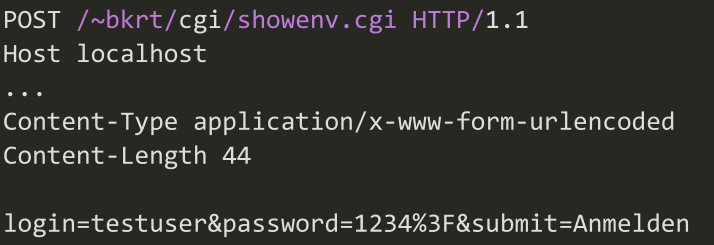
- attribute
action: To where the form result should be sent - attribute
name: The name of form elements. If present it is used to name the parameter else theidis used in the get or post request
| Form | Example | Screenshot |
|---|---|---|
| text | <input type="text"> |
 |
| password | <input type="password"> |
 |
| date | <input type="date"> |
|
| number | <input type="number"> |
|
<input type="email"> |
||
| range | <input type="range"> |
|
| search | <input type="search"> |
|
| color | <input type="color"> |
|
| textarea | <textarea></textarea> |
 |
| radio | <input type="radio" checked> |
 |
| checkbox | <input type="checkbox" checked> |
 |
| select | <select><option value="1">one</option></select> |
 |
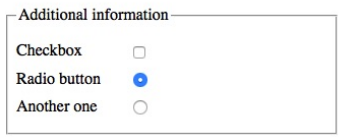
| fieldset | <fieldset><legend>description</legend>...form...</fieldset> |
 |
| file | <input type="file" multiple> |
Focus
With document.activeElement JS can retrieve the currently active focus. To focus (or blur) programaticly use the focus() and blur() methods on the DOMElement
Events
change: If a form element actually changedinput: Input in a text fieldkeydown,keypress,keyup: Key presses on an active form-tagsubmit: When thesubmit-input-tag has been pressed
Read files
<input type="file" multiple>
<script>
let input = document.querySelector("input")
input.addEventListener("change", () => {
    for (let file of Array.from(input.files)) {
        let reader = new FileReader()
        reader.addEventListener("load", () => {
            console.log("File", file.name, "starts with",
            reader.result.slice(0, 20))
        })
        reader.readAsText(file)
    }
})
</script>